
The BH-3 fighter was design by designers Pavel Benes and Miroslav Hajn employed by that time by Avia factory. These two were responsible for famous designs of light monoplane designs named from Avia BH-1, BH-3, BH-9 and BH-11. Although very successful on the field of sport competitions, they didn't succeeded on the military field.
The Avia BH-3 was exceptional in terms of being the parasol winged (the early Benes - Hajn designs being the lower wing designs) aircraft, but it had typical design of the square fuselage profile and the floating rudder.
Regardless its quite elegant appearance, the aircraft was not a success and after both built prototypes crashed, the project was abandoned, first as a fighter and later even as a racer.

This is the only kit I know of this Czechoslovakian 1920s fighter (quite unsuccessful one) and I doubt there will be other. The kit comes in small card box and consists of some 20 light yellow resin parts, sheet of PE parts - instrument panel, straps and some other bits.
The resin parts are very nicely done, the wing has modeled the "hills/valleys" of linen where appropriate, as most of the original aircraft surfaces were covered with plywood. The PE is made by Legato itself and looks very good (the question is how accurate are the PE details, as generally there's a very few sources about these early Czech aircraft).
The camouflage is quite attractive three tone, typical for the early CAF machines with flag type of national insignia. Being a prototype, there were no other identification.
Started with cleaning resin parts. I found out that the one piece wing was bent a bit, so I spent some time to correct it under the stream of hot water. Then I deepen the waves on the linen covering the wing parts. To separate the fuselage from the boss was a bit tricky, because it is on the bottom edge of it, and you need to be careful not to damage the shape. The wheel axe proved very fragile so I sand it off and swap it for syringe needle just to find out later, I've cut it short.
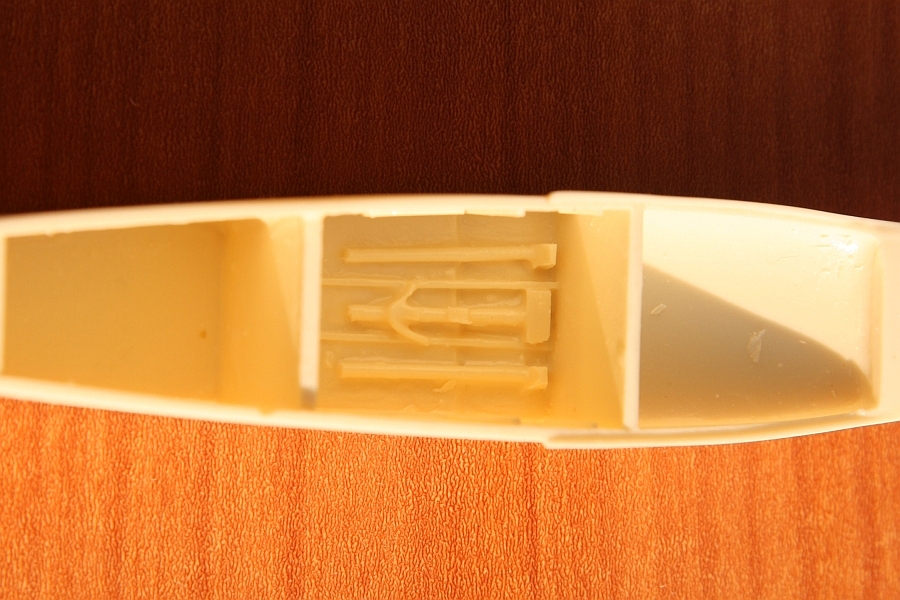
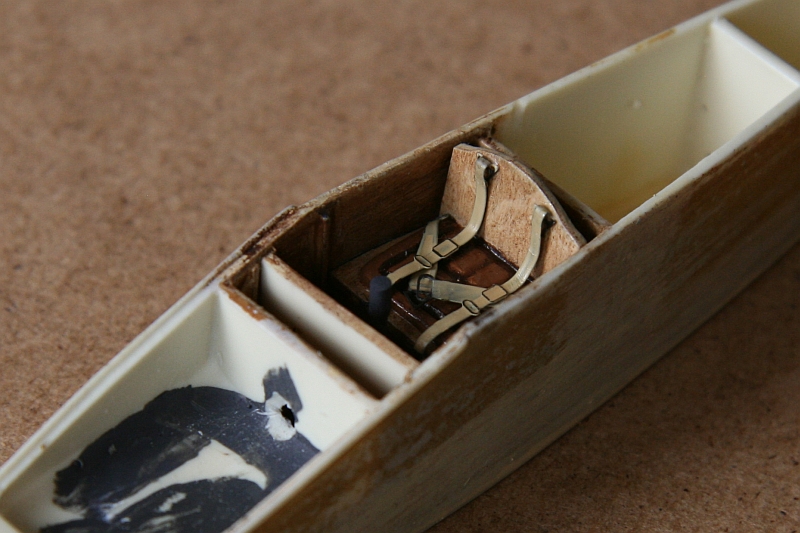
I painted the cockpit and the details going in it (front wall, seat, stick, belts, instrument panel, pedals). There was another tricky assembly, as the cockpit is tiny and therefore very badly accessible. I had to drill the hole in the engine wall to be able to glue the connection to the stick (I had to use a pin instead of PE part, but it served well) as this could be seen through the cockpit opening. The pedals are covered by the front wall but you won't see them.

When I finished the cockpit, I glued the top of the fuselage. A bit of Miliput became handy to fix little gaps. And same went for the engine cover to which I glued the central pylon that holds the wing. The assembled fuselage I sprayed with Surfacer, corrected the scratches and polish the whole thing. Then I sprayed the primer Gunze Sand H79 to imitate the plywood and polished this as well.
Then the tail followed. It with little problem to adjust the horizontal in correct position. The only thing I modified were the elevators that I put to the lowered position. In this stage I painted the fuselage and wing and the supports of the wing.
When everything was dry I glued the wing (it take some adjusting to the correct position), and its supports (again, the holes are there, the pins not) and skid.
Next came the assembly of the undercarriage. I mentioned already the use of syringe needle for the axe, next were the legs that come in four parts, but after some fiddling I manage to put it together and glued the sub-assembly to the fuselage, it is another tricky thing, as there are some holes for the pins, but pins themselves are basically missing. I corrected the paint and attached the details windshield, screw and the wires to the fin (used the wire from Champaign bottle) and wheels. And that was all for the construction.
Regarding the fact, that the fuselage was made of plywood, I painted the cockpit with Gunze sand H and used the oil Siena to make the wood appearence. It was a bit difficult because the fuselage is actually one peace with only top open. The cockpit details were painted before gluing them to their places.
For the outsides I used as a primer (on the Surfacer) again the Gunze sand. Then I painted the bottom with Revell Silver 90 and the top was painted with Gunze Ochre, Green and Brown. Next was the layer of gloss varnish to prevent the "silvering" of the decals. There was no problem with them and there are few, as the aircraft was in reality prototype with standard camouflage. The last was the layer of semigloss varnish to fix the decals and unite the surface of the aircraft.
As the aircraft wasn't in use for very long time, there should not be many warn off marks. I made some ol stains on the engine covering and the exhst stains behind the exhaust pipes. The wheels were sprayed with mixture of browns and sands colour to imitate the airfield dirt. And that was it.
As I said, the only kit, for a price of some 38 dollars you'd get simple kit of an interesting aircraft with good level of details.
June 2009